【Kotlin】
Realmにデータを
保存する方法を解説!
Android, Androidstudio, Kotlin, PC, Realm, Windows, 紹介
以前の記事で、Realmに入ったデータを取得する方法について解説しました。
その時の説明では、既にデータを用意しているという前提で話を進めていましたが、実際にアプリを開発するとなると、こちらからデータを取得するだけでなく、データを保存できるようにしたいという場合もあると思います。
なので、今回はKotlinでRealmを使う方法と、Realmにデータを保存、Realmに保存したデータを表示する方法について例を交えながら解説していきたいと思います。
今回は例として使っているRealmのバージョンは 10.11.0 ですので、ご注意ください。
目次
サンプルアプリの紹介
今回の解説で使用するサンプルアプリはこちらになります。
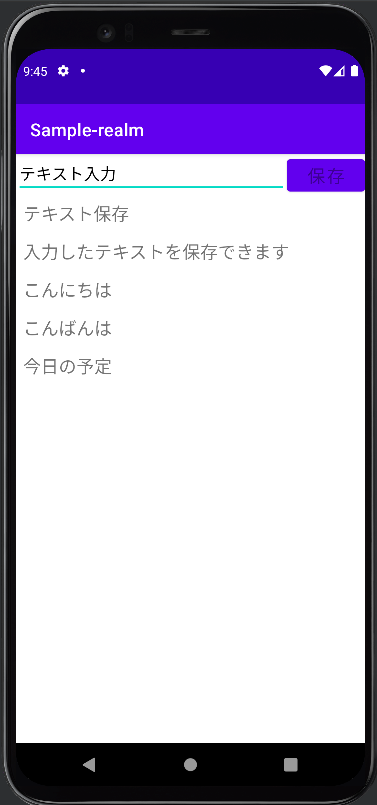
入力したテキストをRealmに保存し、保存した内容を画面に表示するという機能を持っています。
今回はこのサンプルをもとに解説をしていきたいと思います。
サンプルアプリの作成
プロジェクトの作成
まずはサンプルのアプリを作るためのプロジェクトを作成します。最初に選ぶプロジェクトは何でも大丈夫ですが、今回は Empty Activity を選択しました。名前は「Sample-realm」としています。
Realmの導入
プロジェクトの作成が完了したら、Realmを導入して使えるようにします。
まずは、”build.gradle(アプリ名)” を開いてください。
既に数行記載がありますが、一番上に以下のコードを記述します。
// build.gradle(Sample-realm)
// Top-level build file where you can add configuration options common to all sub-projects/modules.
// 以下のbuildscriptを記述
buildscript {
    repositories {
        mavenCentral()
    }
    dependencies {
        classpath "io.realm:realm-gradle-plugin:10.11.0"
    }
}
これでRealmのプラグインを追加しています。バージョンはその時によって変わるので、適宜確認してください。
続いては、”build.gradle(:app)” と書かれたファイルを開いてください。その一番上にpluginsと書かれた箇所があると思います。そこに以下のコードを記述します。
// build.gradle(:app)

plugins {
    id 'com.android.application'
    id 'org.jetbrains.kotlin.android'
    // 以下のコードを記述
    id 'org.jetbrains.kotlin.kapt'
}
//以下のコードを記述
apply plugin: "realm-android"
すると画面の上部にSync nowという表示が出てくると思いますので、そちらを押してください。
Realmの初期化
Realmの導入は完了しましたので、続いてはRealmの初期化を行っていきます。
Applicationクラスの追加
まずは、Applicationクラスを追加したいので、MainActivityと同じ階層に○○Application(サンプルはSampleApplication)というクラスを作成します。作成したら、中身を編集していきます。
まずは、Realmを使えるように以下のコードを記述してください
// SampleApplication.kt

package jp.co.chrono.sample_realm

import android.app.Application
import io.realm.Realm

class SampleApplication: Application() {
    override fun onCreate() {
        super.onCreate()
        Realm.init(this) //Realmの初期化
    }
}
ここではRealmが使えるようにimportと、onCreate()の中でRealmを初期化しています。
Manifestに記述
Applicationの作成が完了したら、それを “AndroidManifest.xml” に追加します。
applicationタグの中に android:name=”Application名” を記述してください
    <application
        android:allowBackup="true"
        android:dataExtractionRules="@xml/data_extraction_rules"
        android:fullBackupContent="@xml/backup_rules"
        android:icon="@mipmap/ic_launcher"
        android:label="@string/app_name"
        android:name="jp.co.chrono.sample_realm.SampleApplication"
        android:roundIcon="@mipmap/ic_launcher_round"
        android:supportsRtl="true"
        android:theme="@style/Theme.Samplerealm"
        tools:targetApi="31">
この記述でアプリのApplicationクラスがSampleApplicationになります。
これでRealmの初期化も完了です。
レイアウトの設定
続いては、画面に表示するレイアウトの実装をしていきます。ただ、今回の趣旨とは少し離れるので、細かい解説等は省略します。
リストの作り方については、以前のブログでも紹介していますので、気になった方はそちらも参考にしてください。
RecycleViewの追加
今回は、表示する内容がリストになっているので、RecycleViewを使いたいと思います。
まずは、 “build.gradle(:app)” を開いて、dependenciesの中に以下のコードを記述してください。
dependencies {
    implementation 'androidx.core:core-ktx:1.7.0'
    implementation 'androidx.appcompat:appcompat:1.5.1'
    implementation 'com.google.android.material:material:1.7.0'
    implementation 'androidx.constraintlayout:constraintlayout:2.1.4'
    testImplementation 'junit:junit:4.13.2'
    androidTestImplementation 'androidx.test.ext:junit:1.1.3'
    androidTestImplementation 'androidx.test.espresso:espresso-core:3.4.0'
    //この一行を追加
    implementation 'androidx.recyclerview:recyclerview:1.2.1'
}
ここでSync Nowが表示されたら、そちらも押してください。
画面のレイアウト
つづいては、画面のレイアウトを設定するので、activity_mainを開き、以下の通りにコードを記述します。細かい設定に関しては自由に決めてしまっても問題ありません。
<?xml version="1.0" encoding="utf-8"?>
<androidx.constraintlayout.widget.ConstraintLayout xmlns:android="http://schemas.android.com/apk/res/android"
    xmlns:app="http://schemas.android.com/apk/res-auto"
    xmlns:tools="http://schemas.android.com/tools"
    android:layout_width="match_parent"
    android:layout_height="match_parent"
    tools:context="jp.co.chrono.sample_realm.MainActivity">

    <EditText
        android:id="@+id/sample_edit_text"
        android:layout_width="0dp"
        android:layout_height="wrap_content"
        android:hint="テキスト入力"
        android:textColor="#000000"
        app:layout_constraintEnd_toStartOf="@id/add_button"
        app:layout_constraintStart_toStartOf="parent"
        app:layout_constraintTop_toTopOf="parent" />

    <Button
        android:id="@+id/add_button"
        android:layout_width="wrap_content"
        android:layout_height="wrap_content"
        android:text="保存"
        android:textColor="#000000"
        android:textSize="20sp"
        app:iconTint="#000000"
        app:layout_constraintEnd_toEndOf="parent"
        app:layout_constraintTop_toTopOf="parent" />

    <androidx.recyclerview.widget.RecyclerView
        android:id="@+id/sample_list"
        android:layout_width="0dp"
        android:layout_height="0dp"
        app:layoutManager="androidx.recyclerview.widget.LinearLayoutManager"
        app:layout_constraintBottom_toBottomOf="parent"
        app:layout_constraintEnd_toEndOf="parent"
        app:layout_constraintStart_toStartOf="parent"
        app:layout_constraintTop_toBottomOf="@+id/sample_edit_text" />

</androidx.constraintlayout.widget.ConstraintLayout>
続いて、リストを表示する新しいファイル(サンプルはitem_sample.xml)を作成し、以下のコードを記述してください。
<?xml version="1.0" encoding="utf-8"?>
<TextView xmlns:android="http://schemas.android.com/apk/res/android"
    android:id="@+id/sample_text_view"
    android:layout_width="match_parent"
    android:layout_height="wrap_content"
    android:padding="8dp"
    android:textSize="20sp" />
これでレイアウトの実装は完了です。
Adapterの実装
続いて、Adapterの実装をするため、Adapterのクラス(サンプルではSampleListAdapter.kt)を作成してください。
作成できたら、以下のコードを記述します。
package jp.co.chrono.sample_realm

import android.view.LayoutInflater
import android.view.View
import android.view.ViewGroup
import android.widget.TextView
import androidx.recyclerview.widget.RecyclerView
import com.example.sample_realm.R

class SampleListAdapter: RecyclerView.Adapter<SampleListAdapter.SampleViewHolder>() {
    private val sampleList = mutableListOf<String>()

    override fun onCreateViewHolder(parent: ViewGroup, viewType: Int): SampleViewHolder {
        val view = LayoutInflater.from(parent.context).inflate(R.layout.item_sample, parent, false)
        return SampleViewHolder(view)
    }

    override fun onBindViewHolder(holder: SampleViewHolder, position: Int) {
        holder.bind(sampleList[position])
    }

    override fun getItemCount(): Int = sampleList.size

    fun updateSampleList(sampleList: List<String>) {
        // 一度クリアしてから新しいメモに入れ替える
        this.sampleList.clear()
        this.sampleList.addAll(sampleList)
        // データに変更があったことをadapterに通知
        notifyDataSetChanged()
    }

    class SampleViewHolder(view: View): RecyclerView.ViewHolder(view) {
        fun bind(sample: String) {
            val textView = itemView.findViewById<TextView>(R.id.sample_text_view)
            textView.text = sample
        }
    }
}
この中では、onBindViewHolder()の中でSampleViewHolderのbind()を呼び出し、TextViewに文字列を入れています。
Adapterが作成できたので、これをRecyclerViewにセットします。
セットするには “MainActivity.kt” の中に以下のようにコードを記述します。
package jp.co.chrono.sample_realm

import androidx.appcompat.app.AppCompatActivity
import android.os.Bundle
import android.widget.Button
import android.widget.EditText
import androidx.recyclerview.widget.RecyclerView
import com.example.sample_realm.R
import io.realm.Realm

class MainActivity : AppCompatActivity() {

    private lateinit var adapter: SampleListAdapter

    override fun onCreate(savedInstanceState: Bundle?) {
        super.onCreate(savedInstanceState)
        setContentView(R.layout.activity_main)
        val recyclerView = findViewById<RecyclerView>(R.id.sample_list)
        adapter = SampleListAdapter()
        recyclerView.adapter = adapter
SampleListAdapterのadapterを定義して、それをonCreate()の中で代入しています。
その後、findViewById()で sample_list を取得してadapterに代入しています。
これでレイアウトの設定も完了です。
Realmとの連携
それでは、今回の本題であるRealmとの連携方法について解説していきます。
まずは、テキストを保存するためのデータ形式を定義するための、クラス(サンプルではDataList.kt)を作成してください。
中身は以下のコードを記述して下さい。
package jp.co.chrono.sample_realm

import io.realm.RealmObject

open class DataList: RealmObject() {
    var name: String = ""
}
今回は、保存する内容がテキストだけなので、nameのみの記述になっています。
そして、ここで重要な点が RealmObjectを継承している点と、open修飾子を付ける点になります。この二つはどちらもRealmライブラリの中で処理をするために必要な記述なので、Realmを使う際は忘れないようにしましょう。
データ形式の定義ができたら、文字列が入力された状態で保存ボタンを押すと画面に表示される機能を実装していきます。
MainActivity.ktをを開き、先ほどの記述の下に新しくコードを記述してください。
        val editText = findViewById<EditText>(R.id.sample_edit_text)
        val addButton = findViewById<Button>(R.id.add_button)

        val realm = Realm.getDefaultInstance()

        addButton.setOnClickListener {
            val text = editText.text.toString()
            if (text.isEmpty()) {
                //テキストが空の場合には無視をする
                return@setOnClickListener
            }

            // Realmのトランザクション
            realm.executeTransactionAsync {
                //DataListのオブジェクト作成
                val data = it.createObject(DataList::class.java)
                //nameに先ほど入力されたtextを入れる
                data.name = text
                //データの上書きをする
                it.copyFromRealm(data)
            }
            //テキスト入力欄を空にする
            editText.text.clear()
        }
内容について解説していきます。
まずは1,2行目では findViewById を使って EditText と Button のViewを取得しています。
4行目ではRealmのインスタンスを取得しています。この記述はRealmの操作を行うときには必ず記述しないといけないので、これも忘れないように注意しましょう。
6から24行目はボタンを押したときの処理を記述しています。
空のテキストを保存しないように、最初に文字列が入っているかのチェックをしています。文字列が入力されている時は次の realm.executeTransactionAsync() の処理に進みます。
そこではまず、DataListのオブジェクトを作成します。この時、同時にRealmのDBにも登録がされます。
その後、オブジェクトに入力された文字列を代入し、copyFromRealm() でデータを上書きしています。
これで、文字列をDBに登録することができます。
その後の editText.text.clear は次の内容を入力しやすいように、テキスト入力欄を空にしています。
以上の内容が記述できたら、その下にまた以下のコードを記述します。
        // DBに変更があった時に通知が来る
        realm.addChangeListener {
            //変更があった時にリストをアップデートする
            val sampleList = it.where(DataList::class.java).findAll().map { it.name }
            //UIスレッドで更新する
            recyclerView.post {
                adapter.updateSampleList(sampleList)
            }
        }

        // 初回表示の時にメモ一覧を表示
        realm.executeTransactionAsync {
            val sampleList = it.where(DataList::class.java).findAll().map { it.name }
            // UIスレッドで更新する
            recyclerView.post {
                adapter.updateSampleList(sampleList)
            }
        }
    }
}
この記述は二つに分かれていますが、どちらもAdapterの updateSampleLIst() を呼び出しています。
一つ目は、DBに変更があった際に表示しているリストを更新しています。
しかし、それだけだとアプリを起動した時に何も表示されないので、初回表示の時にもDBの内容を表示するようにしています。
詳しい内容としては、where().findAll() を使って、DBに登録されているDataListを取得し、それを引数にして updateSampleList() を呼び出しています。
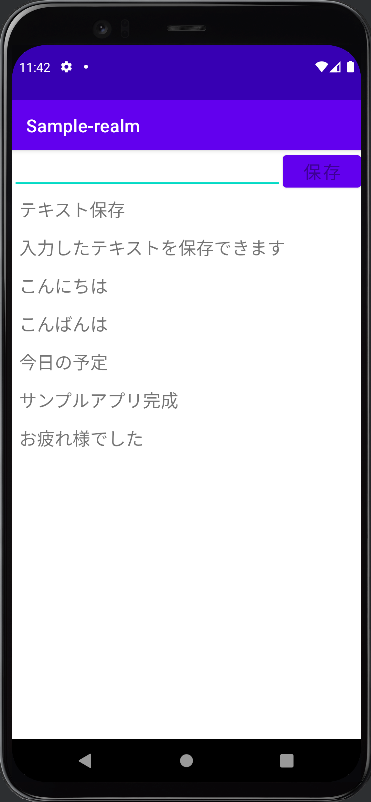
アプリの完成
以上でサンプルアプリの作成は完了です。
実際に触ってみると、入力したテキストを保存できていることが確認できると思います。
まとめ
いかがでしたでしょうか。今回は基本的な内容の解説になりましたが、今後もRealmを使う機会は増えてくると思いますので、入門としてぜひ参考にしてみてください